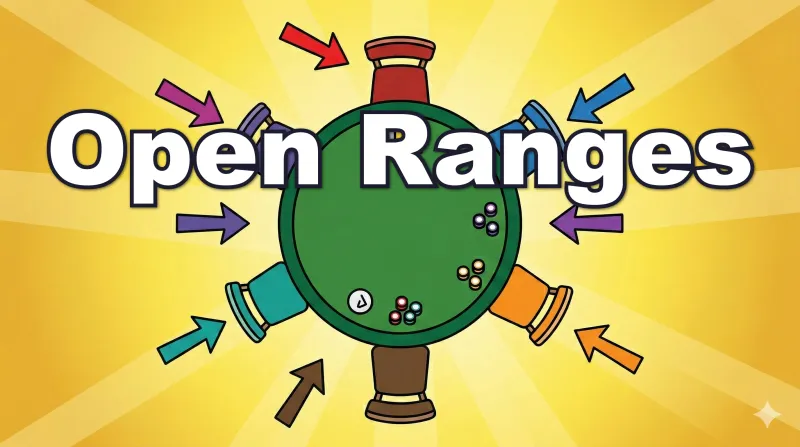
Learn the Opening Range for Each Position
A beginner-friendly guide to poker opening ranges by position. Learn which hands to open from UTG through SB with concrete examples.
📝 Where this article fits: Fundamentals 2 / 3 | You can read a range chart but aren't sure which hands to open from each position. Reading How to Read a Range Chart and Open-Raises and 3-Bets first will make this article easier to follow.
Learn the Opening Range for Each Position
In the previous article you learned how to read a hand range chart. Now that you can read the chart, it's time to look at what's inside — which hands you should open-raise from each position.
What You'll Learn
- The range of hands each position (UTG / HJ / CO / BTN / SB) opens with
- Why ranges get wider the later your position
- Why SB is unique with three actions (raise / limp / fold)
- Memorization Tips: the "players behind + 2" rule
📋 Verify the Assumptions
📝 An opening range is the set of hands you open-raise with when no one has entered the pot before you.
The data in this article was generated under the following conditions.
- Players: 6-max table
- Stack depth: 100 BB
- Source: GTO Wizard
- Action: Open-raise when no player has entered the pot before you
When we say "the top X% of hands," that refers to how many of the total 1,326 combos you open. For example, "top ~18%" means you open roughly 1,326 × 0.18 ≈ ~239 combos.
🗺️ The Big Picture — Later Position = Wider Range
Let's start with an overview of each position.
| Position | % of Hands Played | Players Behind |
|---|---|---|
| UTG | Top ~18% | 5 |
| HJ | Top ~21% | 4 |
| CO | Top ~27% | 3 |
| BTN | Top ~44% | 2 |
| SB | Top ~40% (raise only) | 1 |
The logic is simple: the fewer players left to act behind you, the lower the risk of running into a strong hand. That's why later positions can play a wider range.
🔴 UTG Opening Range (Top ~18%)
UTG is the first to act at a 6-max table. With five players still behind, this is the tightest range of all.
How to read the chart: red = raise, blue = fold. The shading shows the frequency. Hover over a cell for exact numbers.
UTG Key Points
- Pocket pairs: 88+ opens at 100%. 77 is a ~75% mixed strategy. 66 and below are low frequency
- Ax suited: A2s through AKs all open
- Broadway: AKo through ATo, KQo through KJo at 100%. QJo is a ~67% mix
- Suited connectors: JTs at 100%. T9s at only ~23%
💡 Think of UTG's range as "premium hands + all Ax suited + strong broadways."
🟠 HJ Opening Range (Top ~21%)
HJ sits right next to UTG. The range opens up slightly, but the difference is small. Focus on what changed compared to UTG.
Key Changes from UTG
- 77 upgrades to 100% — was a ~75% mix at UTG, now a guaranteed open
- J9s added at 100% — a suited one-gapper enters the range
- Q8s upgrades to 100% — was ~20% at UTG
- T9s rises from 23% to 72% — still a mix, but opens much more often
- KTo upgrades to 100% — was ~26% at UTG
- QJo upgrades to 100% — was a ~67% mix at UTG
- A9o (~54%) and A5o (~29%) appear — weak offsuit Aces start showing up
🟡 CO Opening Range (Top ~27%)
The range widens noticeably from CO. You're one seat before the BTN with three players behind, but the number of playable hands increases substantially.
CO Key Points
- 55-66 upgrade to 100% — mid pocket pairs become guaranteed opens
- K3s through KQs — all suited Kings open — only K2s is still out
- J7s-J8s, T8s, 98s added at 100% — suited connectors expand significantly
- A9o upgrades to 100%, A8o (~98%) added — weak offsuit Aces enter in force
- A5o rises to ~74% — was ~29% at HJ, now opens at high frequency
- JTo and QTo upgrade to 100% — nearly all offsuit broadways are guaranteed opens
🟢 BTN Opening Range (Top ~44%)
BTN is the most advantageous position. With only the two blinds left behind, the range is at its widest.
BTN Key Points
- 33 and above open at 100% — even 22 opens at ~66%
- All suited Kings (K2s-KQs) open — if you have a King and it's suited, you play it
- Suited connectors nearly all added — 86s, 76s, 65s all open at 100%
- AKo through A4o open at 100% — A3o also opens at ~75%
- K9o, Q9o, J9o, T9o all at 100% — mid-rank offsuit hands join the range
- About 583 combos out of 1,326 total (~44%) are open-worthy
💡 BTN is "very wide but not anything goes." About 56% of hands are still folded. K2o, Q7o and below, J7o and below don't make the cut.
🔵 SB Opening Range (Top ~40% Raise Only)
⚠️ SB works differently from every other position. UTG through BTN choose between raise or fold. SB has a third option: limp (call).
The SB grid uses three colors: red = raise, green = call (limp), blue = fold. Many hands that don't raise still enter the pot by limping.
SB Characteristics
SB's range is dominated by mixed strategies. Almost every cell has a split percentage, and only a handful of hands — AKs, AQs, AJs, KJs — are 100% raise. The rest use a combination of raising and limping.
An interesting pattern: suited hands sometimes raise less often than their offsuit counterparts. For example, A5s (~69%) < A5o (89%). Suited hands can profitably see the flop by limping because they have flush-draw potential, so limping is often preferred over raising.
💡 SB's three-way split (raise / limp / fold) is hard to memorize. As a starting point, opening the same range as BTN with a raise is a reasonable approximation. Once you're comfortable, you can layer in SB-specific limp strategies.
🧩 Memorization Tips — The "Players Behind + 2" Rule
You don't need to memorize all five positions by heart. For pocket pairs, use this shortcut: the lowest pair you can open is roughly the number of players behind you + 2.
- UTG: 5 behind → 5+2 = 7 → 77 and up (actual: 88+ at 100%, 77 at ~75%)
- HJ: 4 behind → 4+2 = 6 → 66 and up (actual: 77+ at 100%, 66 at ~77%)
- CO: 3 behind → 3+2 = 5 → 55 and up (actual: 55+ at 100%)
- BTN: 2 behind → 2+2 = 4 → 44 and up (actual: 33+ at 100%)
- SB: 1 behind → 1+2 = 3 → 33 and up (actual: all pairs played via raise + limp)
It's only a rough guide, but it makes the ranges much easier to remember.
📚 External Resources
The data in this article comes from GTO Wizard, a solver tool. Even the free plan lets you view range charts, so give it a try if you want to explore on your own. Beyond opening ranges, you can also study 3-bet and 4-bet ranges.
🎓 Practice Scenarios
Q1: You're dealt KJo in UTG. Do you open?
Show answer
Yes — open (100%). KJo is a guaranteed open as a broadway hand even from UTG.
Q2: You're dealt 66 in HJ. Do you open?
Show answer
Yes — open (~77%). 66 is a high-frequency mixed strategy at HJ. The "players behind + 2" rule also gives 4+2 = 6, right on the borderline.
Q3: You're dealt A5o in CO. Do you open?
Show answer
Yes — open (~74%). Weak offsuit Aces start entering the range in full from CO.
⚠️ Common Misconceptions
1. "BTN can open anything"
BTN does play a wide range, but it's only the top ~44% — about 56% of hands are still folded. K2o, Q7o and below, J7o and below, 86o and below are all folds.
2. "You need to replicate mixed frequencies exactly"
For hands with mixed strategies, the solver's solution means both actions have the same expected value. In practice, you don't need to replicate the exact mix. Instead, adjust your decision based on your opponent's tendencies.
🎯 Summary
- Opening ranges widen as your position moves later (UTG top ~18% → BTN top ~44%)
- Use "players behind + 2" to remember the pocket-pair cutoff
- Broadway hands are limited from UTG but nearly all open from BTN
- Weak Aces (A9o and below) gradually enter starting from HJ
- SB is the only position with a three-action structure: raise / limp / fold
Now that you know each position's opening range, let's flip the perspective — practice imagining what hands your opponent might hold when they open.
Found this helpful?
Bookmark this page to revisit anytime!
Ctrl+D (Mac: ⌘+D)
Found an error or have a question about this article? Let us know.
✉️ Contact Us